


How to Hang Curtains: (Step-by-Step guide)
5 minutes read
Hanging curtains seems easy, but proper installation makes the difference between a sharp, exquisite look and an ugly result. We’ve perfected the art of curtain fitting in East Africa. Follow this step-by-step guide to hang your curtains and transform your windows into beautiful works of art.
1.
Gather Your Tools and Materials
Before you begin, have everything you need out and ready: drill with proper drill bits, spirit level, measuring tape, pencil, screws and anchors, ladder or step stool, and your curtain rod and brackets. All tools having been prepared ahead of time saves time and allows for quick installation.
2. Mark Your Rod Placement
Position your curtain rod 15–25cm above the window frame to create the illusion of taller windows and a breezier room. Space the rod 20cm wider on either side of the window frame so the curtains open fully without blocking light.
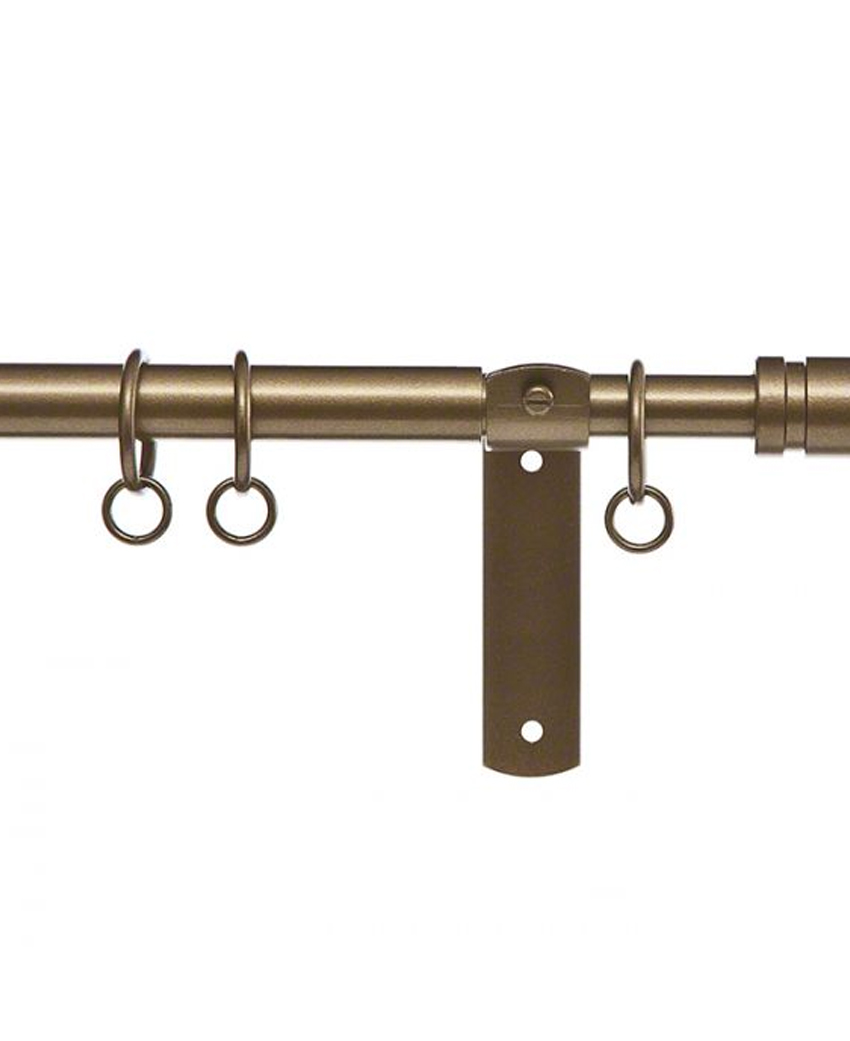
3. Install the Brackets
Hold the first bracket at your indicated position and pencil-mark the screw holes. Drill pilot holes at these markings, employing wall anchors if mounting to drywall or plaster instead of studs. Tighten the bracket securely with screws. Do the same for the second bracket, using your level to make certain both brackets are exactly the same height. For heavy curtains or motorized curtain systems, ensure brackets are weight-rated and consider mounting in wall studs for the best support.


4. Prepare Your Curtains;
Iron your curtains before hanging them to remove any wrinkles or creases. Iron them flat while they are still wet using a low-heat iron and a pressing cloth for the more delicate fabrics. If your curtains have rings with clips or hooks, now is the time to put them on, leaving the clips every 10–15cm apart along the width of the curtain for maximum draping.
5.Hang the Rod and Curtains For final-removable rods, remove one of the decorative finials. Thread your eyelets or curtain rings on the rod, ensuring they’re the correct way around. Hold the rod in the air and put one end into the bracket that has been installed. Put the other end into the second bracket, and then replace the finial. Some of these bracket systems require screwing the rod in using small screws—don’t forget to do this, as loose rods will come out.
6.Organize and Adjust After hanging, stand back and consider the overall look. Distribute the cloth of the curtain evenly along the rod, creating even folds or pleats. On pinch-pleated curtains, let each pleat drop evenly and in a straight line. Check that curtains drop to your desired height—should hover 1–2cm above the floor for floor-length, or pool slightly for dramatic puddle effect. Tighten ring or hook spacing if needed to get it right in the length.

7. Style Your Curtains
Open curtains and utilize tiebacks or holdbacks at around two-thirds of the window’s height to create elegant swoops. This serves a purpose while being aesthetically pleasing. To create layered effects, hang sheers on an inner rod closer to the window, and set heavier drapes on an outer rod. This set from Tanj’s collection offers versatile light control and privacy solutions.
8. Special Considerations
Bay windows require adjustable curtain tracks to bend around corners, or individual rods for each window section. Arched windows are stunning with rods placed above the arc or specialty curved hardware. Motorized curtains require careful track installation to make the motors accessible and systems operate smoothly.


